
As a private pilot, the weather is often of particular interest to me. I like a good rainy day or thunderstorm as much as the next person, but when you're in a light aircraft, they're really not ideal - especially when flying in or around mountains, and I hear there's at least a few of those here in Colorado.
Of course, aviation has solved this with some of the most regularly-updated and precise weather reporting around, and as such, where there's even a small public airport, there's probably a weather station emitting METAR reports. Even better, there's four rough categories of weather for flying - VFR, MVFR, IFR, and LIFR. Sounds like a good subject for a map to me.
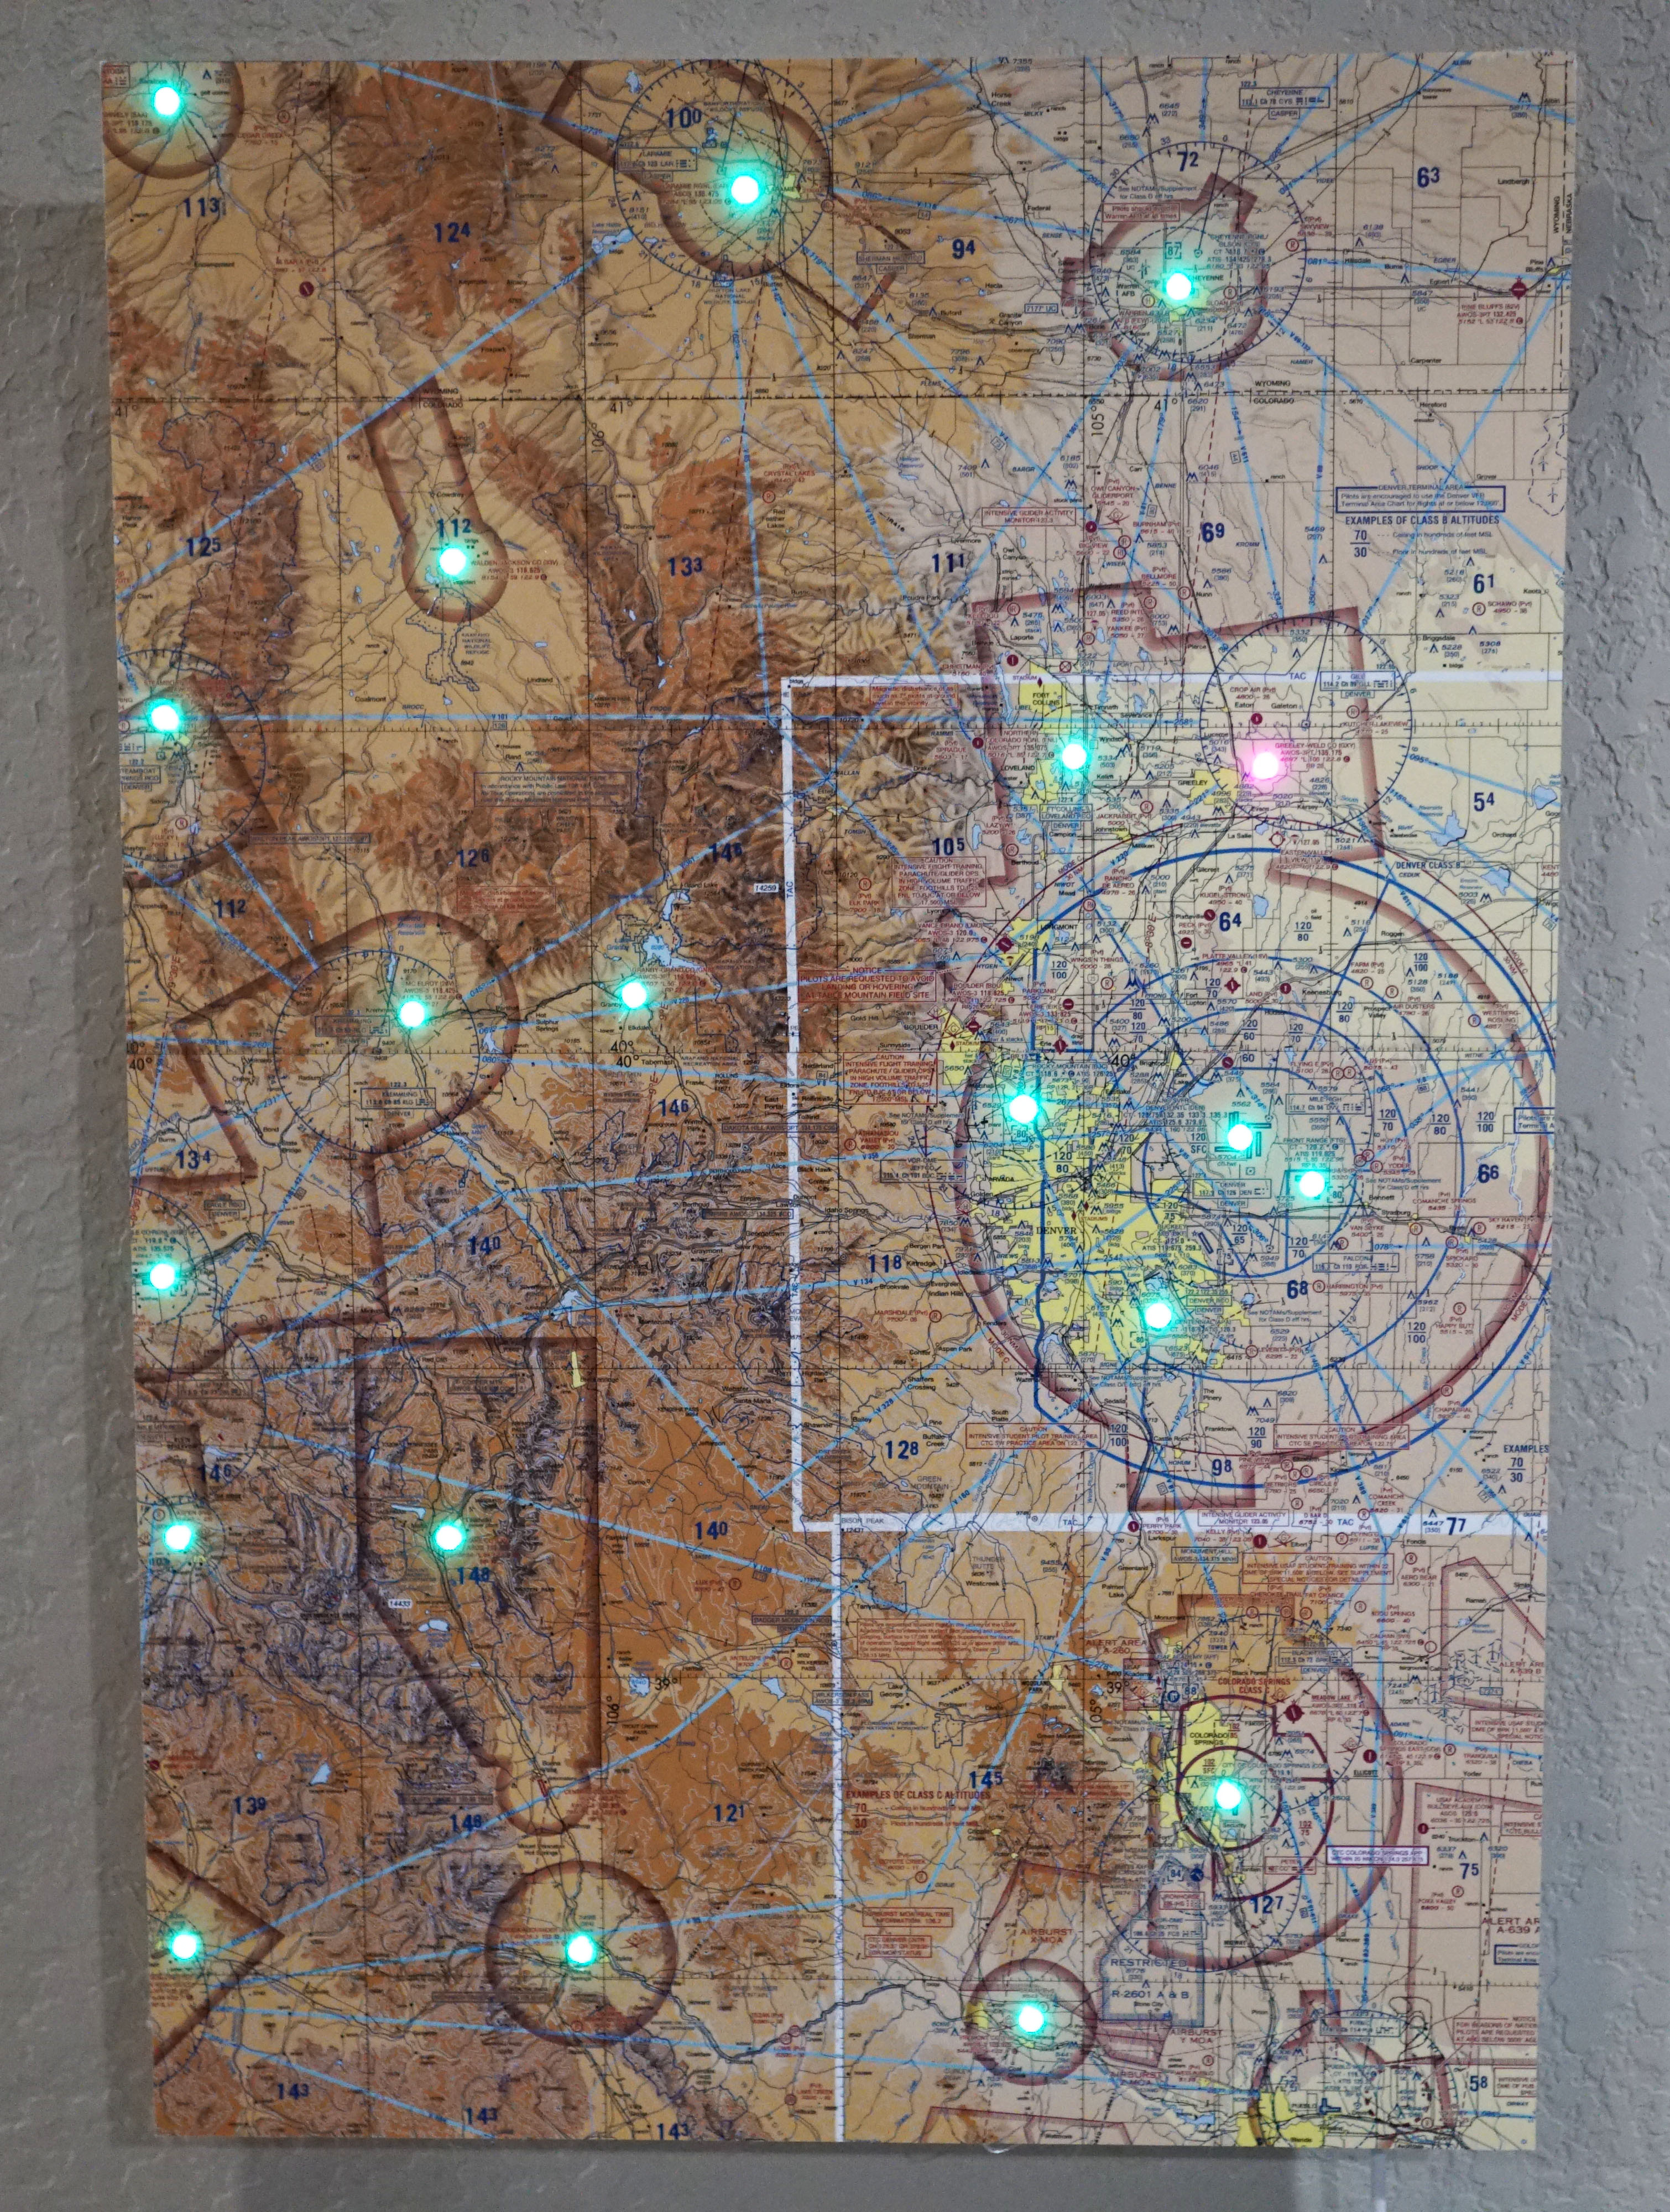
So, I've built an aviation weather map with lights at each airport showing the weather. Two maps, actually - I built one last year for the San Francisco Bay Area, but moving state meant redoing the map, so I've recorded the build in the video above, and I'm writing this down so you too can build one if you wish.
The Build
The actual physical map for the build is made of:
- A high-quality inkjet print on 13"x19" semigloss paper (but any way of getting a nice paper map will do!)
- Foamcore / Foamboard (cut to size)
- Spray glue (to hold them together)
- Two short pieces of square wood dowel (to provide a hanging mount/wall offset)
- A spring punch (to make the holes for the LEDs - something around 5mm or 1/4" is best)
Then the electronics take a little bit extra:
- A Particle Photon (but realistically any microcontroller will do with some code changes)
- Addressable 5050 LEDs (Adafruit sells these as NeoPixels)
- Varied small-gauge wire (I just have reels of 10 different colours in 0.6mm/22AWG size)
- Prototyping board and female headers (to attach the microcontroller to - or, just solder to it directly and skip this)
- Solder and soldering iron (I am a fan of the TS100)
- Hot Glue (to hold the LEDs down and provide some diffusion)
- Tape (to hold down the LEDs and wires; kapton tape is probably best given how insulating it is)
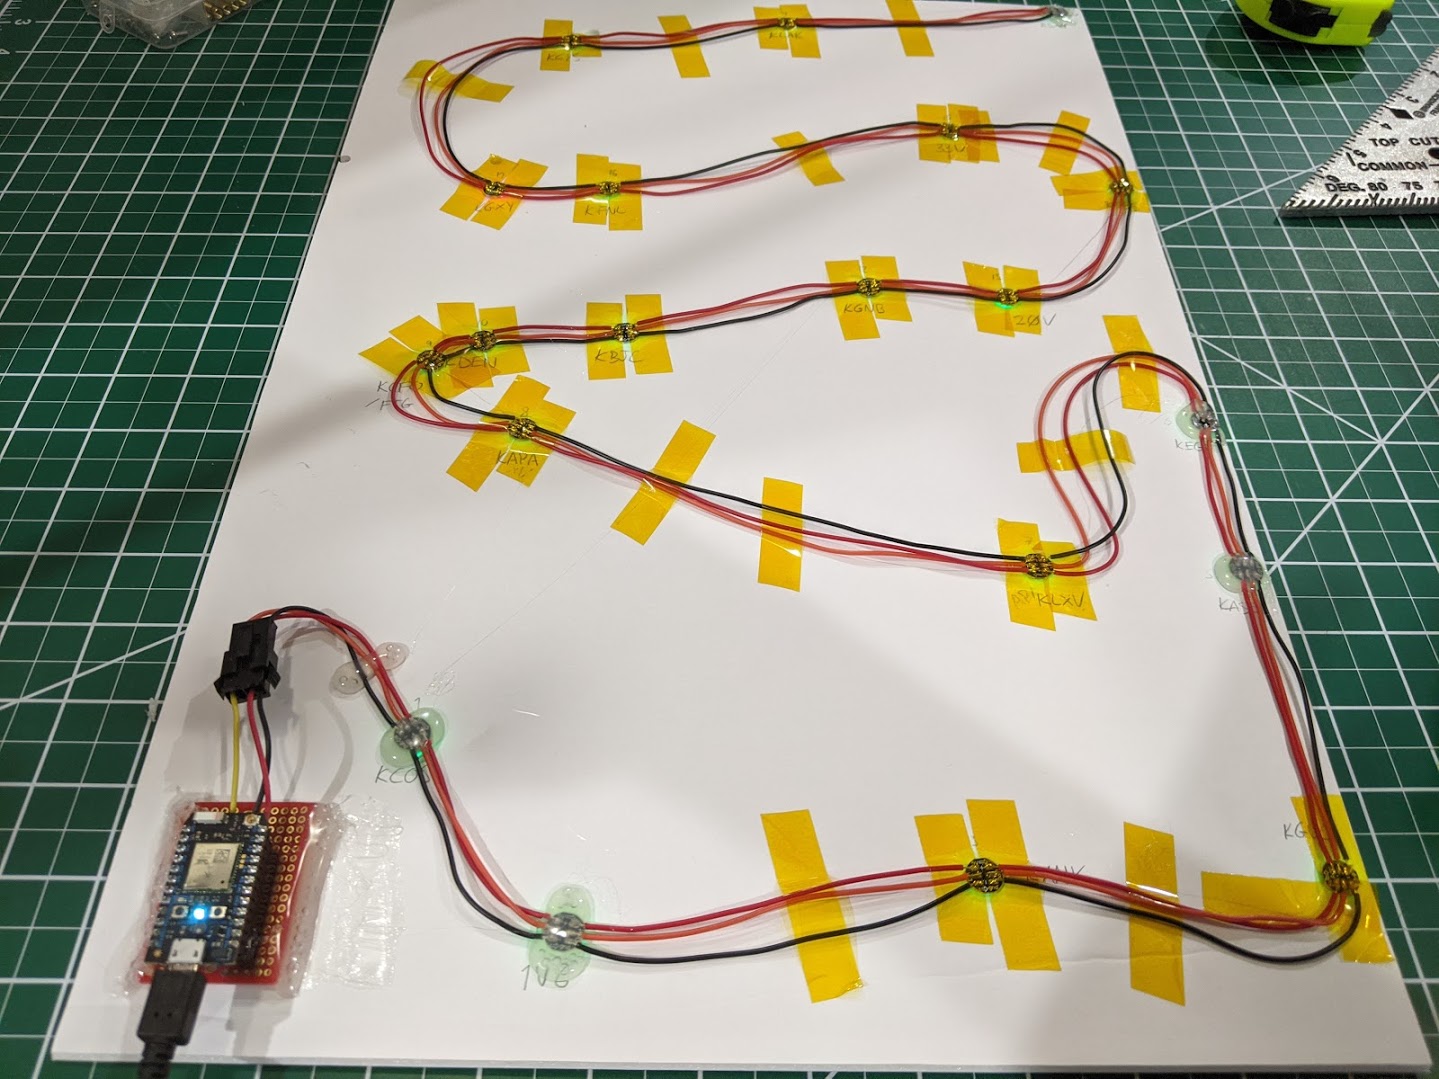
You can see the full build process in the video, but the basic steps are:
- Print and cut out your map, and mount it onto the foamcore with spray glue. You either want to have a nice flush, square edge, or a frame it's going to fit perfectly in that has at least 2cm of depth behind it for the electronics.
- Identify the airports you want to put LEDs in place of - verify they have METAR information available on something like AirNav!
- Poke small holes (with a needle or very small drill) from the centre of the airports through to the back of the foamcore) so you can locate them from the back
- Use the spring punch from the back to punch the holes into the foamcore and through the map. If you do it from the front, you'll get nasty dents as the foamcore gets compressed.
- Sketch out the path of a single set of wires that will run continuously between all the LEDS on the back in a single path.
- Place the LEDs over the holes on the back of the map, with their in/out data pads aligned with the path you drew (so you can actually solder them well later). Tape them down.
- Use a very small dab of hot glue in the hole on the front to both secure the LED, and to provide a diffuser so it's not a point light. You could, instead, buy LEDs with built-in diffusers and poke those through, but I didn't have these.
- Solder all the LEDs together in a long chain using three runs of wire, making sure you solder positive to positive, ground to ground, and data out to data in. Warning: this takes a long, long time and is annoying.
- Either tape or hot glue the LEDs down from the back to keep them fully in place.
- Attach your microcontroller to the end of the LED chain and hook up the power and ground lines to the power pins on your microcontroller (making sure its power regulator has enough overhead for the extra current) and the data line to one of the digital-out pins.
- Edit the software to set the correct set of airport codes in sequence (starting at the LED closest to the microcontroller) and the right data pin.
- Hot-glue on the wood pieces and hang it on the wall!
The Software
The software for this is relatively simple, and I've uploaded mine to GitHub so you can take a look over it.
I've used a Particle board, because I'm a fan of both their flash-over-the-air technology and the ability to handle API requests on the server side; on the device you just subscribe to and send simple text-based events, and then in the Particle console you can tie those into API calls that handle the SSL and JSON decoding for you. It's rather nice, and Particle do charge a small monthly fee for the Device Cloud usage but I personally find it worth it (it's especially nice with their LTE boards that do all this, transparently, over mobile data - including the flashing part!)
If you want to use a more standard Arduino-like board, you'll have to replace the Particle eventing code with an SSL client and a JSON decoder, so expect to use a moderately powerful Arduino board for that. You could also put a Raspberry Pi as the driving board if you really want to go all-out; there's plenty of libraries for talking to addressable pixels from the Pi's GPIO pins, and you can use a nice language like Python!
Additionally, as I mention in the video, I used a piece of code to turn a set of image tiles from a tiled "slippy" map server into a single PNG; that's part of my landcarve suite of tools, and you can find it on GitHub. There's not a great user manual for it right now, but if you do landcarve tileimage --help you can hopefully figure it out.
The Finished Product
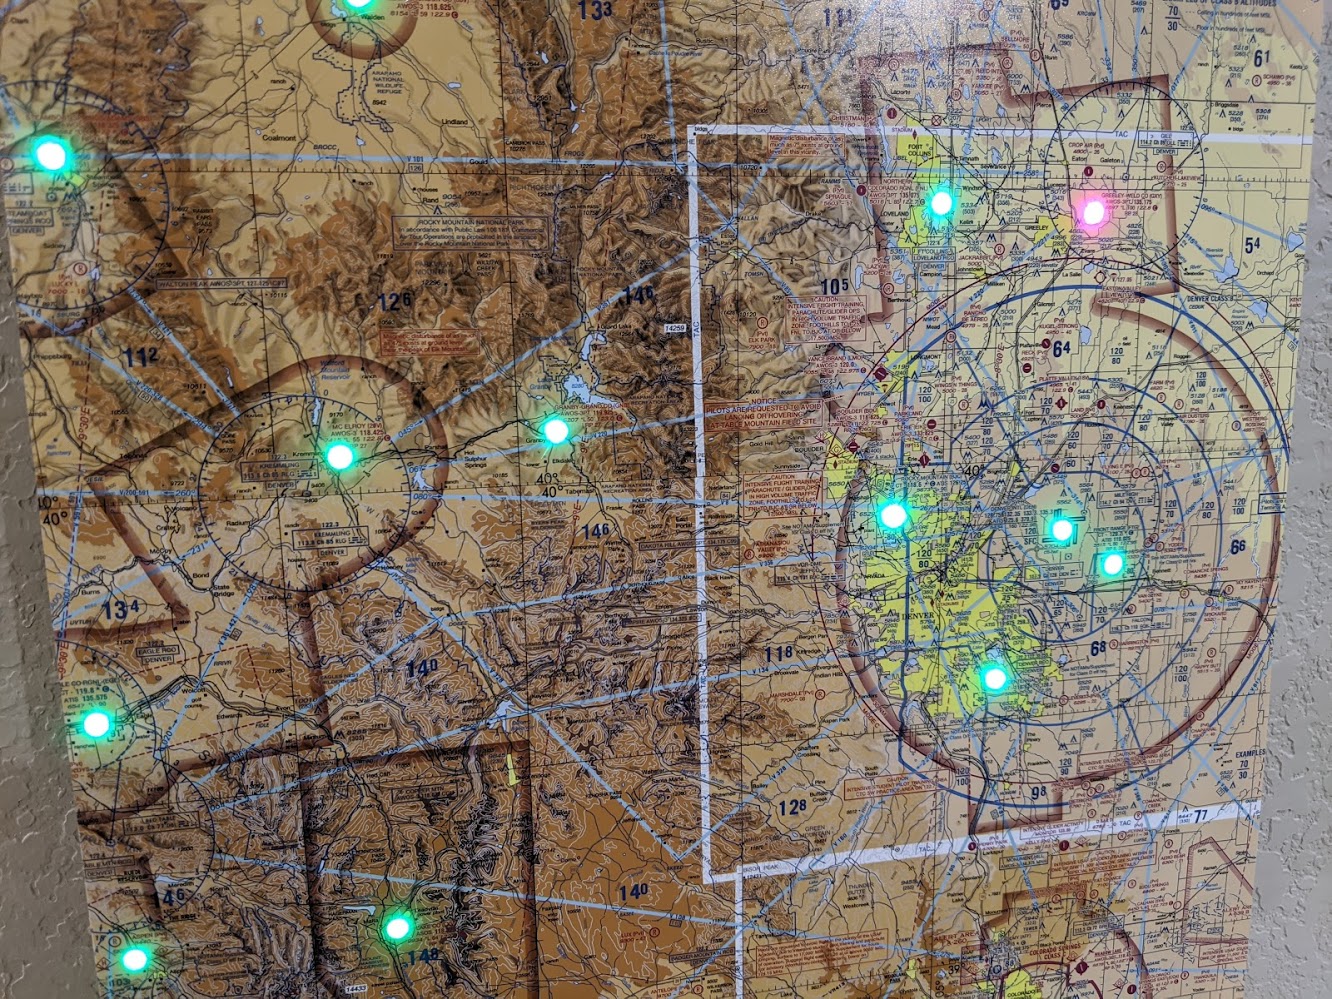
It's a nice moderate build - the LED soldering is the main annoying part of it - but I do enjoy having the map up in my study, and as a bonus, it's useful to glance at when I am about to go flying to see if it's even worth heading out, or cancelling due to weather.
I also found it fun on the San Francisco version to watch weather literally roll across the map from the coastal side as the marine layer drew in; the weather here in Colorado has been pretty nice since I built this version, so it's mostly shining green the whole time, but I'm curious to see if there's a similar effect as mountain/winter storms roll across the state.
I would love to build a bigger version of this that was all of Colorado - after all, it's a rectangular state, so it's easy to make a wall map of - but that needs a large-format printer, and I don't have easy access to one of those right now; I'd have to go to a printing shop to get it done and pay the requisite cost. I might still do that, but during these times of pandemic, I am trying to keep my projects as inside-the-house as possible for now.
I guess there's also room to build a several-hundred-LEDs version of this that's the whole country, but the map you see here was already about 4 hours of soldering wires onto tiny pads; I think at that scale, I'd just try and find a proper pre-made string of addressable LEDs and just deal with the extra wires and depth somehow!